
Knurled News is the best way to stay in-the know with all things related to your home gym. Deals, new products, community projects and industry analysis is sent 2x per week!
Intro
As we move into warmer months, moving your workouts outdoors can be appealing. Whether it is to soak up the sun, blend workout time with backyard family time, or just for a change of scenery, working out outside is something most of us need to take advantage of while we can. An outdoor pull-up bar is one of the most versatile implements across all training modalities. Check out this DIY option below for inspiration.
Materials:
All of these items but the Pull-up Bar can be picked up at your local hardware store.
- 2- 16’, 4×4, pressure treated posts
- 1- 2x4x6, pressure-treated lumber
- Pull-up Bar
- 4- 50 lb bags of Quikrete
- Post Hole Digger
- Drill
- Ratchet screwdriver
- Tape measurer
- Ladder
- 2- screws (minimum)
Step 1: Choosing the location
This may be the most important step. Make sure you find a place you could see yourself working out (otherwise, you might not use it), and it has at least a little bit of open space. Also, think long-term with this spot because moving cemented in posts would be a pain. This location must be spouse-approved!
Step 2: Digging the holes
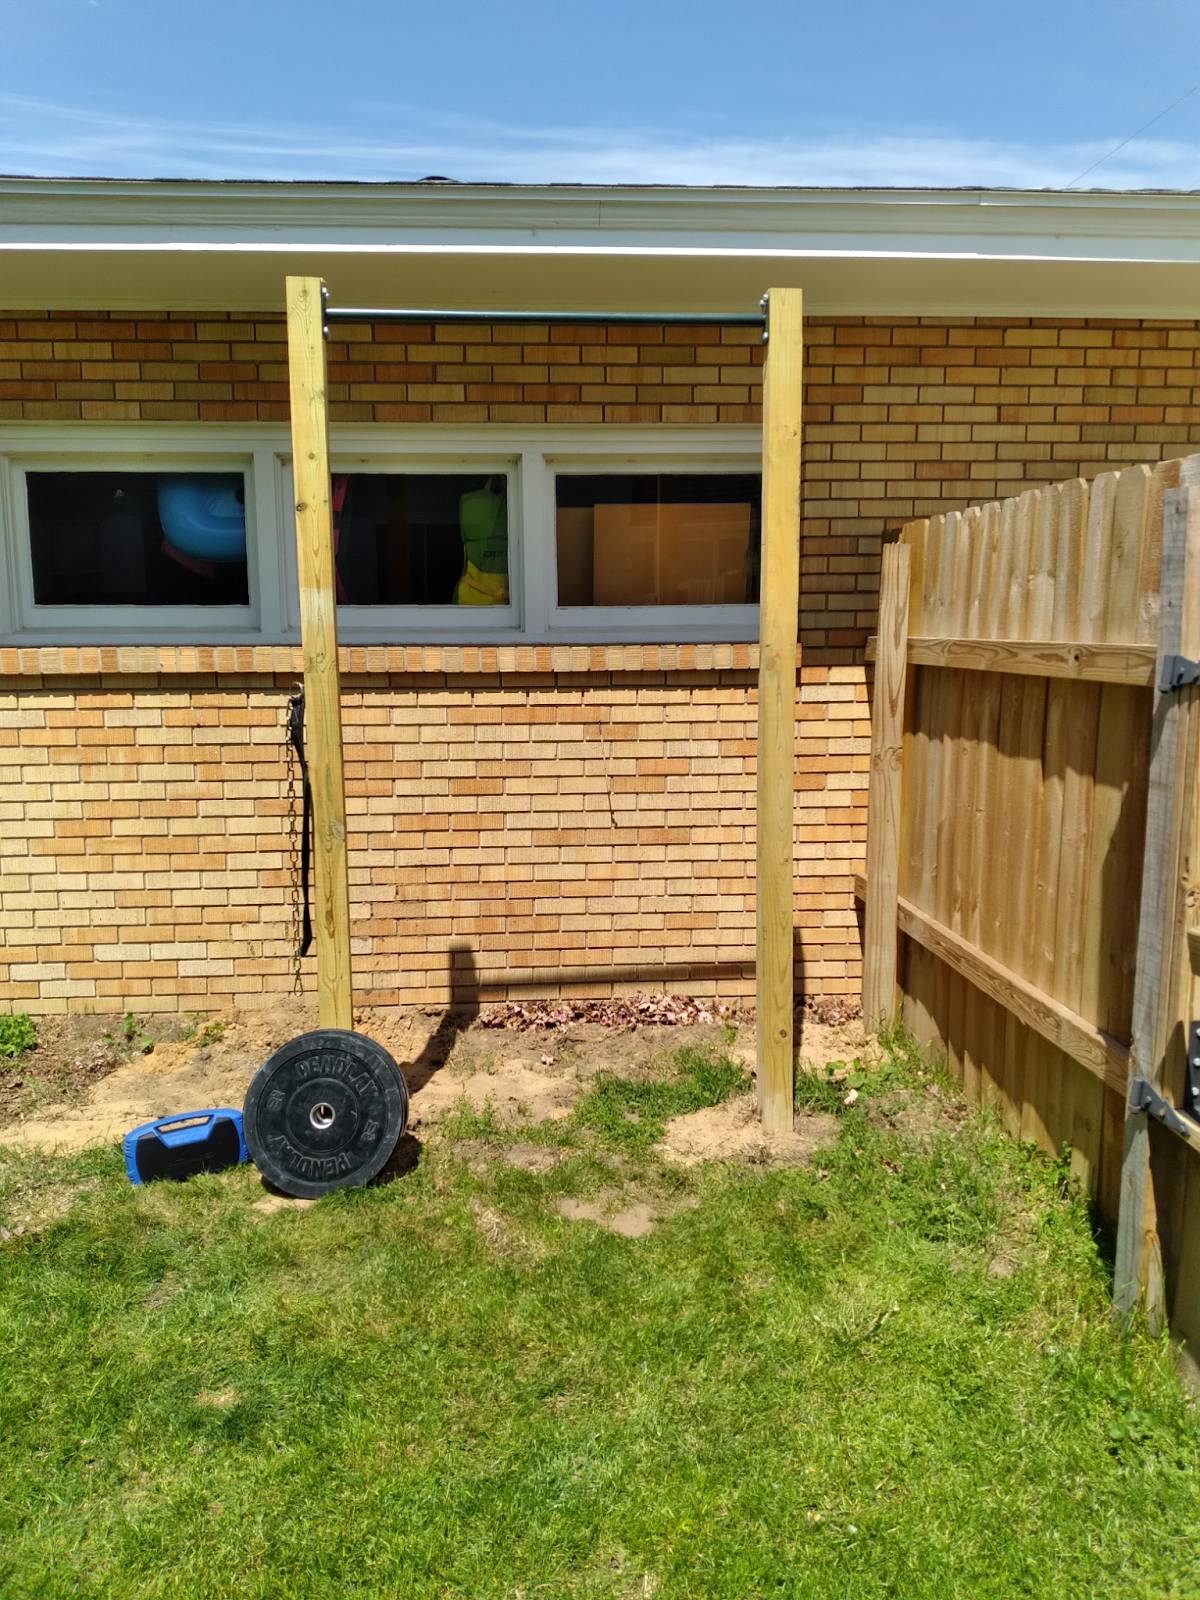
You’re going to want to know all your specs before you start digging. For this, the height for this pull-up bar is 9 ft off the ground. The posts were put in the ground half of that distance; 2- 4.5’ holes were dug with the inside edges just under 4’ apart (the length of the bar).
In having the posts around an 1/8″ under 4 ft, the bar would fit tight in between the posts and it would appear to be standing straight up to the naked eye.
In this example, the holes were placed the same distance from the wall of the house to be more aesthetic.
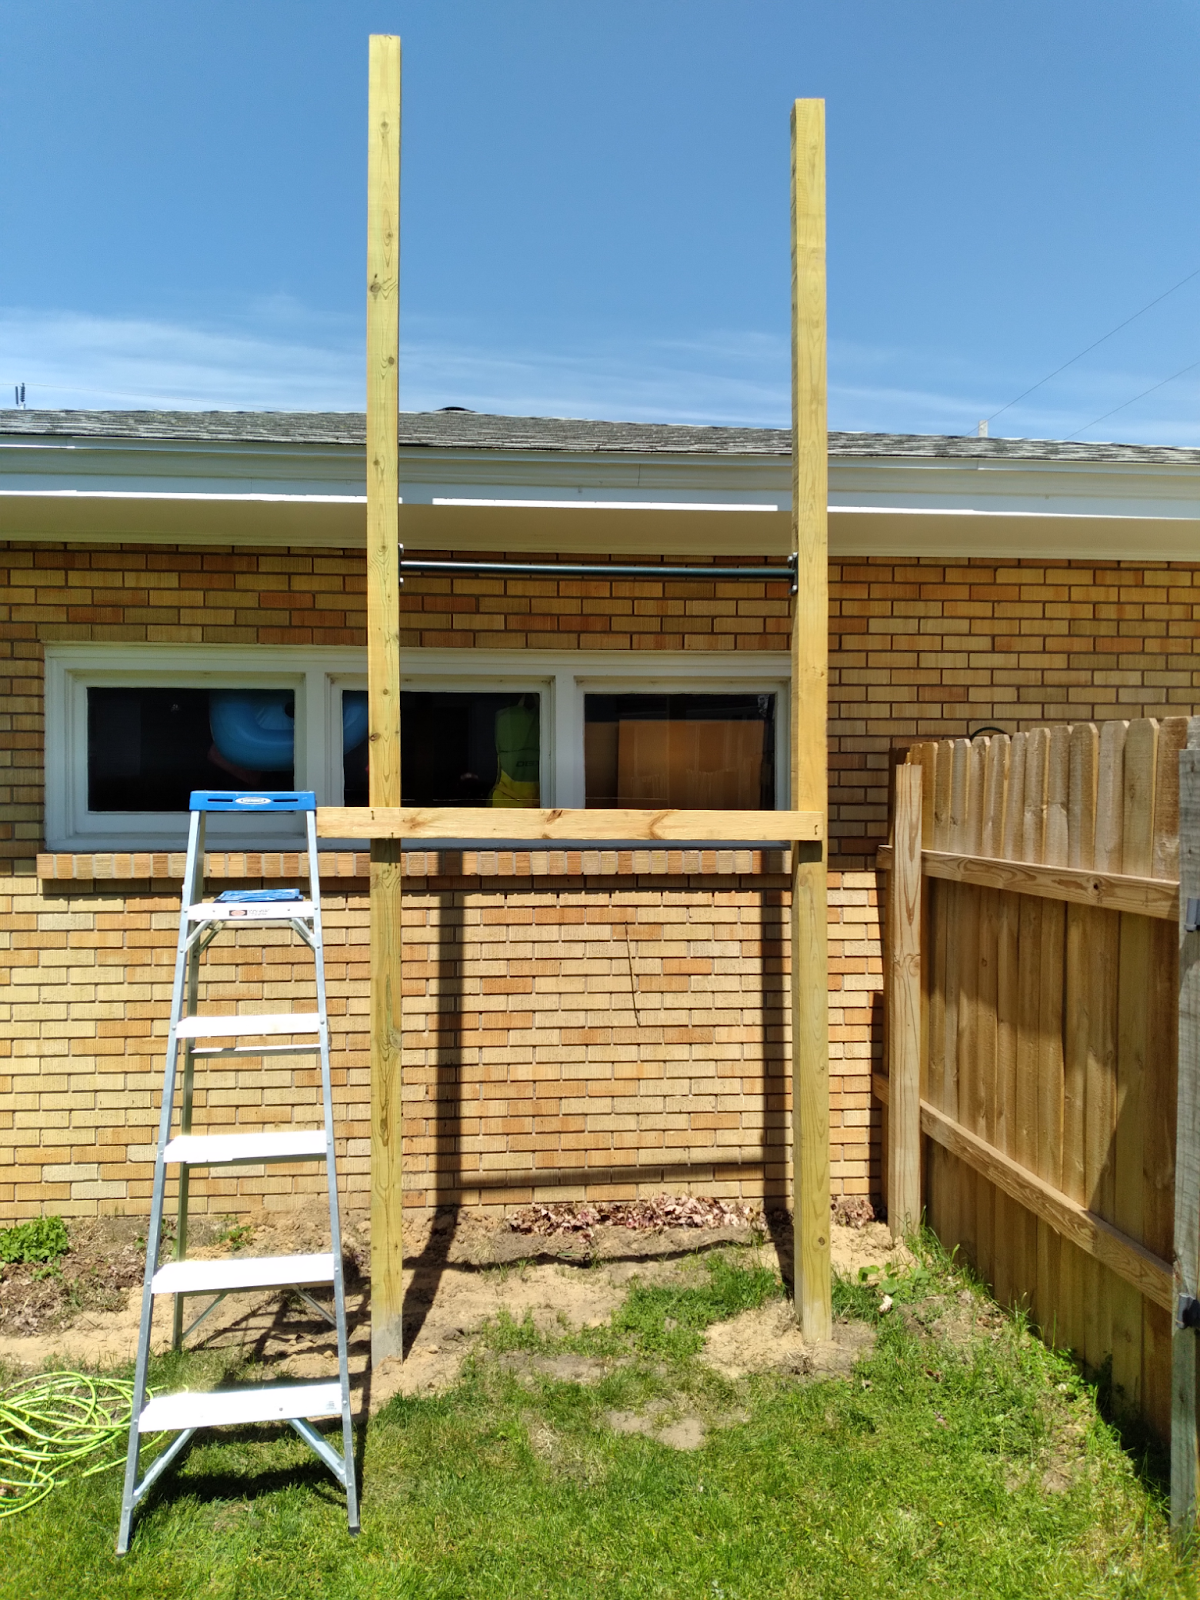
Step 3: Setting the posts
For this project, 16’- 4×4 pressure treated posts were used. To ensure that the posts were the correct distance apart from each other and from the wall of the house, all while making sure that they stayed level forward/backward and side to side, an extra pair of hands is recommended.
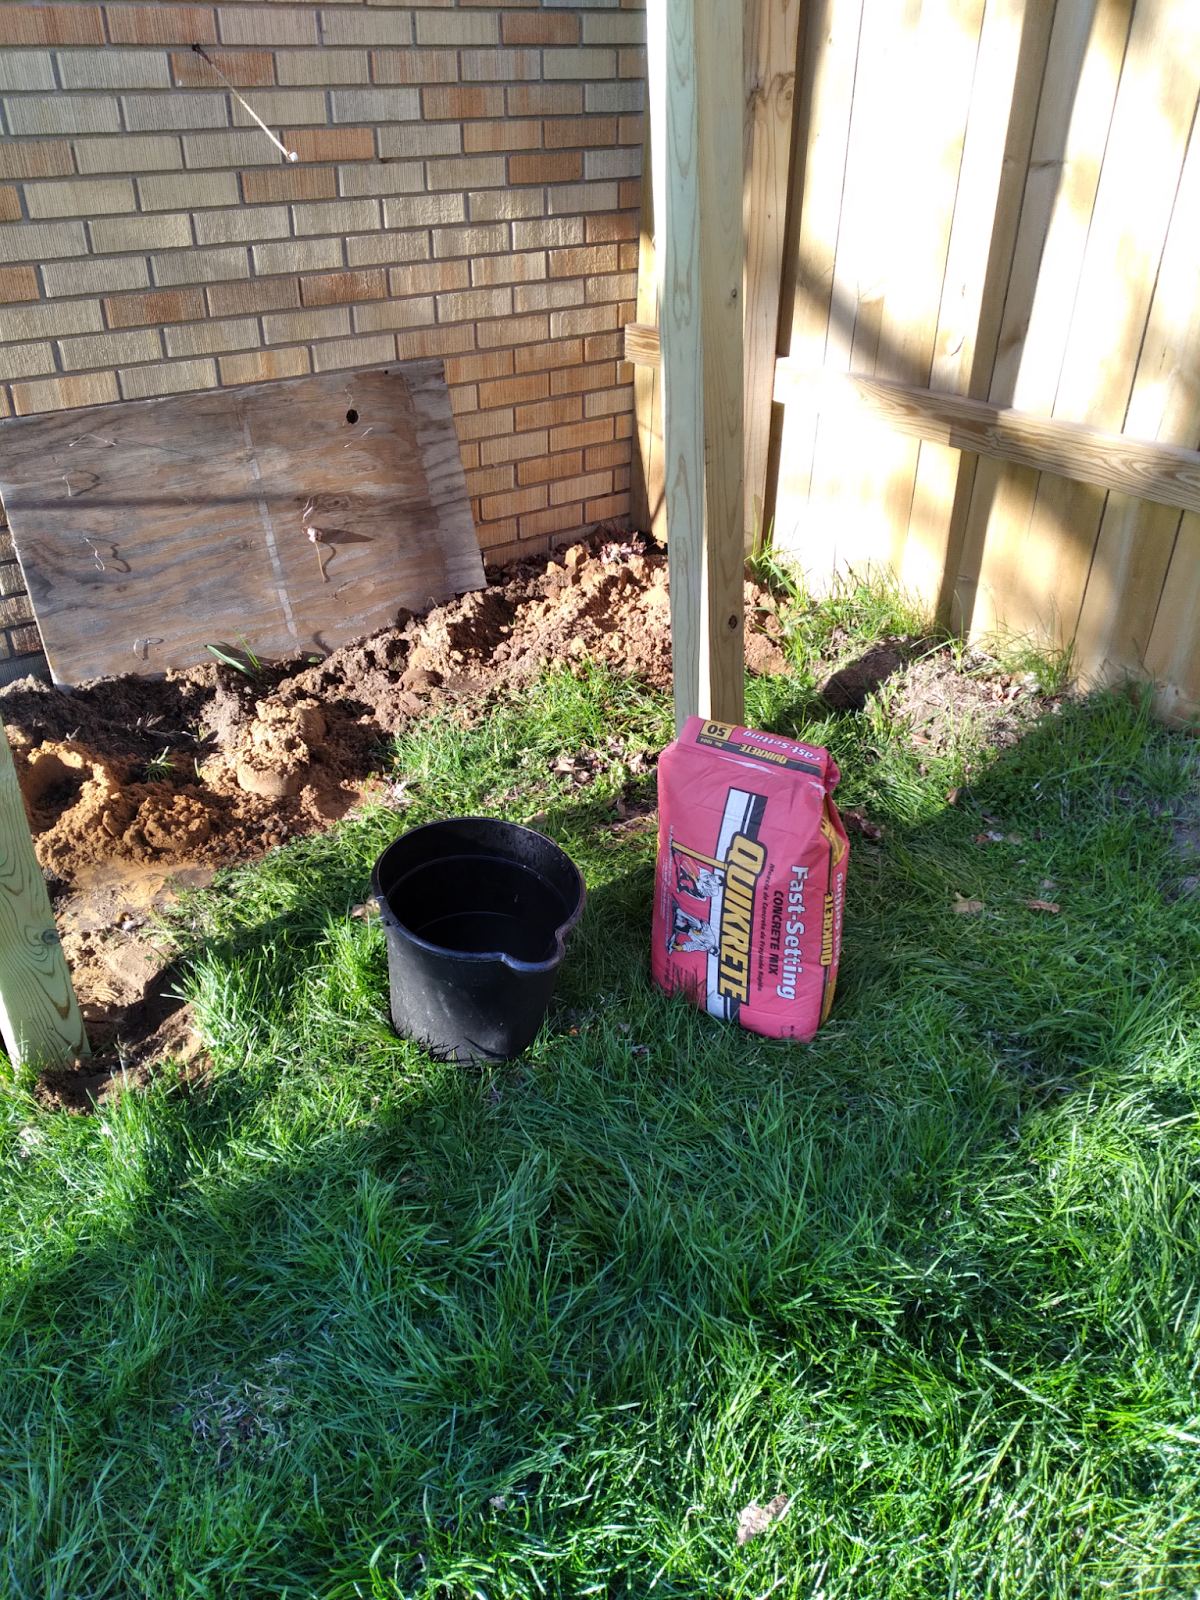
Start by setting a single post and making sure everything is level/lined up. Be sure to have your concrete, water, and stirring stick at your work site. For this project, a 50 lb bag of Quickcrete was used for the initial setting of each post. Follow labeled instructions on the bag of concrete to set the first post. Give it about 20-30 minutes before starting to set the 2nd post.

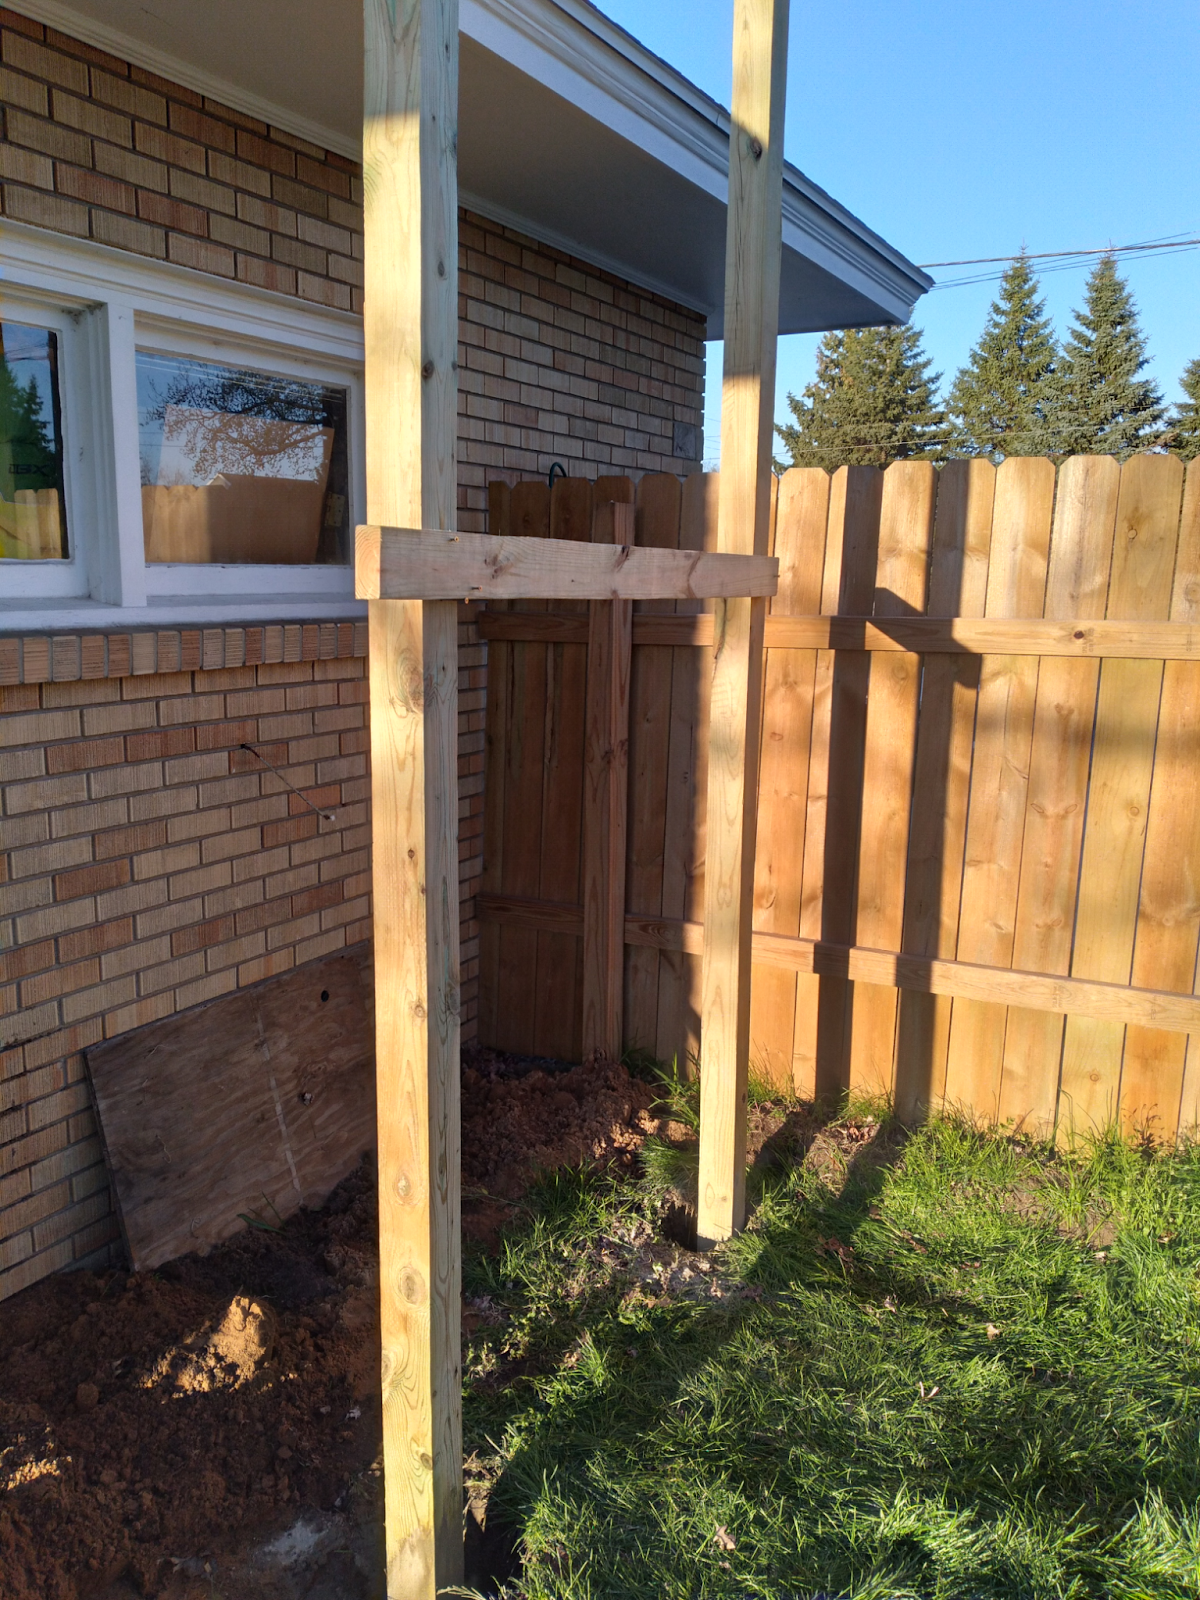
It’s important to make sure that the bottom all the way to the top of the second post remains exactly 4’ (or 1/8″ under 4′) from the first post and that both remain level.
Do this by screwing a 2×4 into the first post, and when the 2nd post is all level/lined up, screw the 2×4 into it to brace the structure.
Use the second bag of concrete to set the second post.
Don’t fill in the rest of the hole with access dirt. Allow the posts to sit overnight (or until the concrete is dry). Use an additional bag of 50 lb concrete (1 for each hole) after the initial concrete has dried.
Step 4: Securing the Pull-up Bar
Using 16’ posts only 4.5’ in the ground leaves you with 11.5’ posts cemented on your property. Don’t worry. You will be able to cut off the access when you’re finishing up.
You have options for what to use for the actual bar. For this project, this bar that we found on Amazon turned out to work great.
Figure out what height you want your pull-up bar to be and attach the bar to the posts. 3″ bolts are recommended.
Quick tip: secure a basic construction screw to the first post so that you can work on securing it to the opposite side without having to hold up the bar while you work. This will let the pull-up bar rest while you attach 1 side at a time. Be sure to throw a level on your bar before attaching the second side.

Step 5: (Optional) Add Attachments
Before you chop off any additional height, think about adding a med ball target for wall-balls (check out this target from Titan Fitness; designed for a rack that can easily be attached to one of your posts), or lag-eye bolts to attach TRX or Olympic rings to in the future. You could also attach a battle-rope anchor to the bottom of one of the posts.
If you are interested in adding a dip section, think about buying 2 additional pull-up bars and putting in 2 more posts in front of the original posts. Connect the 2 additional bars parallel from each other around 4.5’ from the ground, giving the gymnastics ‘parallel bars’ look/feel. This would obviously cost more and take up more of a footprint, but it would give you versatility and additional support.
Step 6: Hacking off the Extras
With a skill saw, slice off any extra height. TIMBERRRRRR
Step 7: Enjoy
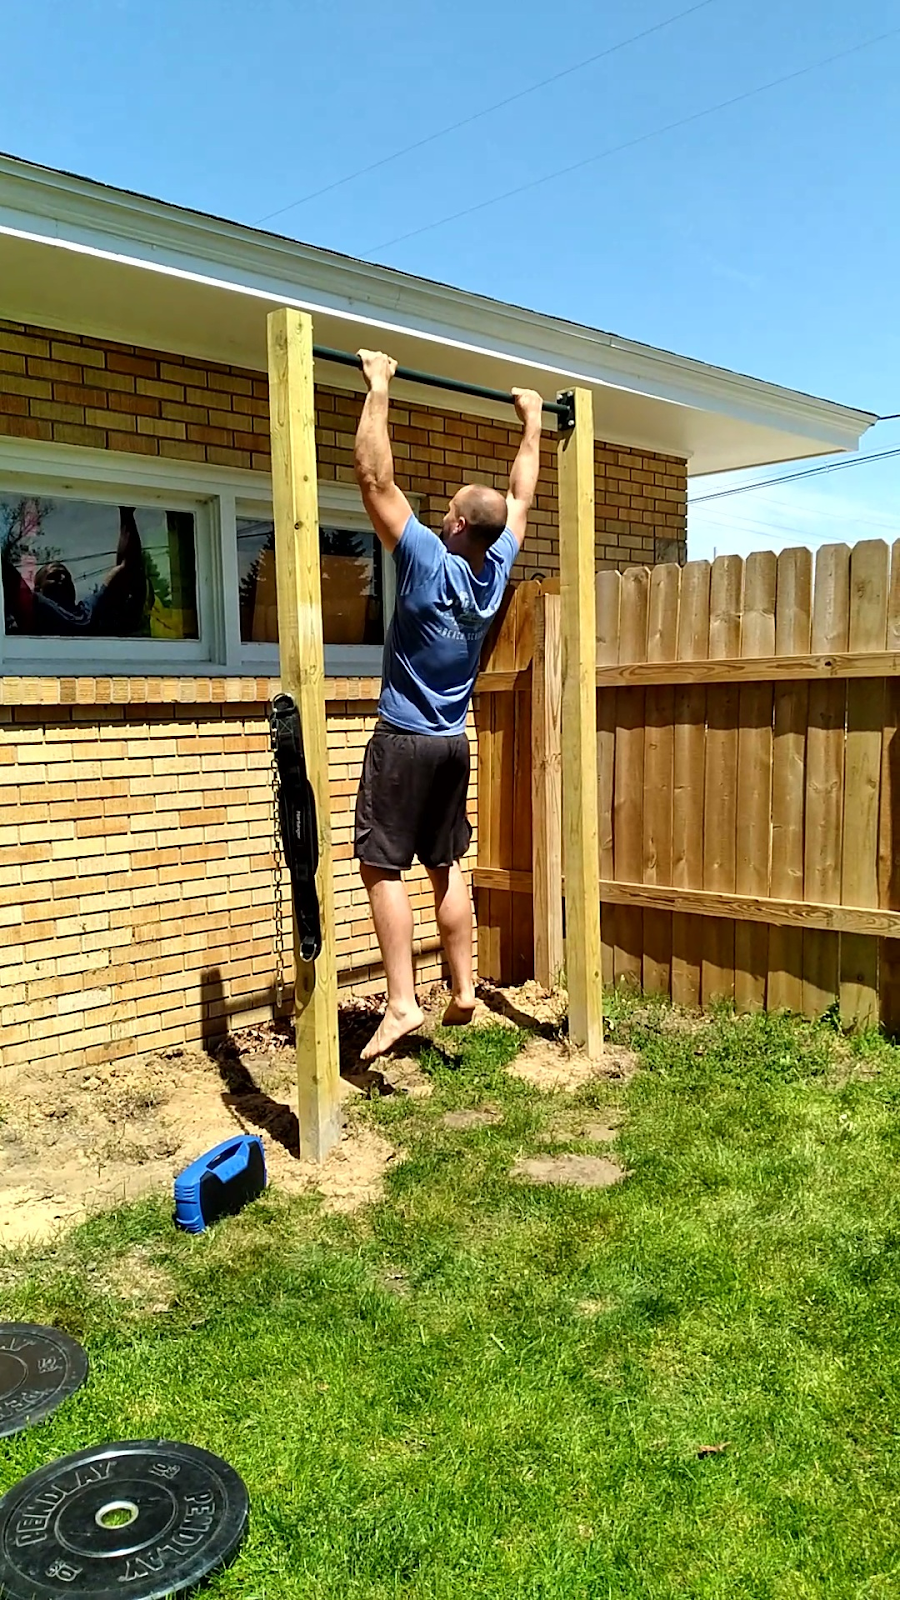
Enjoy! Overall, this process was relatively easy. With an approximately 9’ tall pull-up bar that is 4.5’ in the ground with 2 bags of Quickcrete in each hole, there is still a little movement, but it is not at ground level. The bar is plenty sturdy for strict or kipping pull-ups, butterfly pull-ups, or even toes-to-bar.
Conclusion
This simple, and relatively affordable DIY pull-up bar can be a great addition to your growing home gym. Outdoor workout areas can get you outside, help you blend your workout time with backyard family time, or just give you a different area to achieve your fitness goals. Get outside, workout, and share your progress with us at Garage Gym Experiment! Happy lifting!
One more thing…
Most survey respondents do not spend much time working out in the great outdoors. 52% workout less than 2 times a month in the open air, and just 14% get a workout in over 15 times (survey results from 1.3.2021). This would be an excellent option to incentivize more to get outside.

How have the 4×4’s been holding up? I’m debating whether to go 4×4, 4×6 or 6×6
looked pretty wobbly there in that video…………